Prepping a La Frite SBC AML-S805X-AC to Work for OctoPrint
Goal
In this post, I’ll show you how to get a Libre Computer La Frite SBC ready for using with OctoPrint.
Introduction
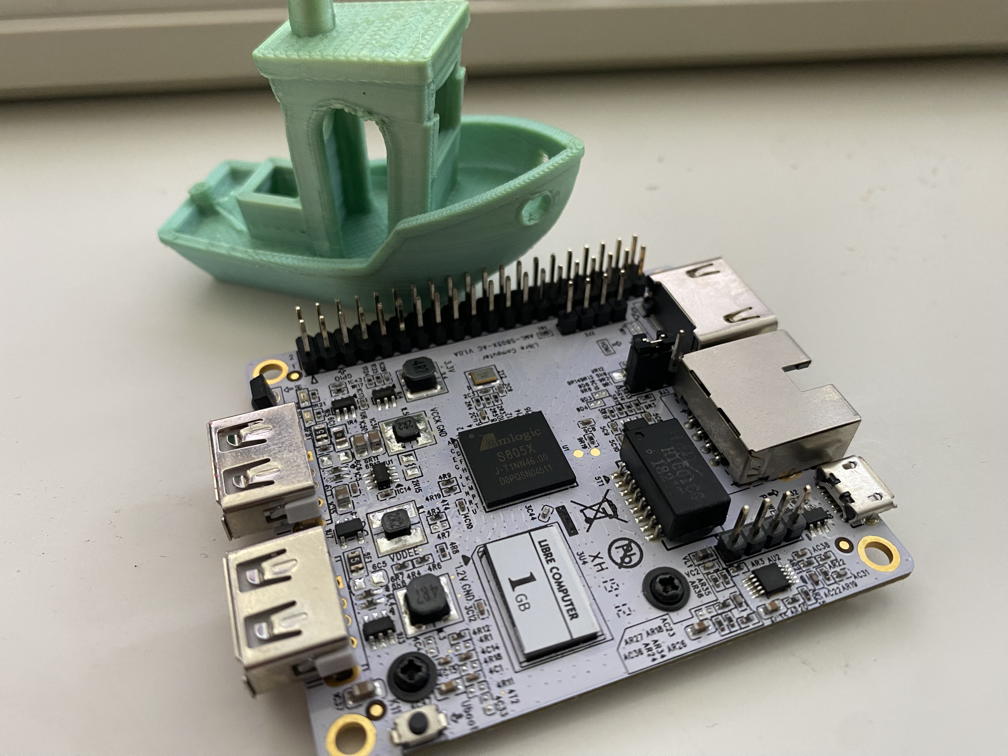
During the pandemic, I was looking for a web camera in order to outfit my family’s new work from home requirements. Somehow I stumbled onto the Linux Plumbers Conference Presenter’s kit at some online store. It included a 1080 Web Cam, two usb lights, a usb headset, a four-port USB hub, and a Libre Computer AML-S805X-AC (La Frite) 1Gb Single Board Computer all for $20.
I quickly tried to get the board working but didn’t have any luck and put it away in a storage bin. Last month, I watched a Linus Tech Tips on Raspberry Pi Alternatives and the Libre Computer La Potato board was mentioned as a great alternative inspiring to pull my board out and try to use it for OctoPrint. Luckily, there are way more instructions out there now and I’ve been sucessful in replacing my Raspberry Pi in order to use it for another project.
Hardware
This process requires the following pieces:
- The La Frite board with 1Gb of RAM
- An official Libre Computer eMMC Module. I’m using the 8GB one but the 16GB is about $9USD.
- An HDMI Cable.
- A thumb drive.
- A high amp micro USB power cord (Mine is 3A).
- A simple, linux friendly usb wifi dongle if you want wireless access.
- A USB keyboard.
- Ethernet cable and internet connection.
- A windows PC AND a Linux machine (you may not need both but I ended up needing them to make the different tutorials and guides work.)
This board only has two USB ports, no sd card slot, and no onboard wifi. We need to flash a new firmware to the board and then an OS to the eMMC module.
Flashing the new Firmware
This board has a really nice process for flashing firmware, however, it doesn’t seem to work with the latest version. I found this article on how to install it by fixing the firmware package and getting it ready to upload to the board. Once you follow these instructions, it is super easy to install:
Updating firmware on LibreComputer La Frite in 2022 (I used Ubuntu.)
Once you’ve gotten through all those instructions (including copying your new files to a thumb drive), plug your La Frite into a monitor, and power cord. Now you can follow these instructions from the La Frite forums:
5) Eject the drive from your computer and plug it into La Frite.
6) Power on La Frite and it will start updating the firmware.
7) Do not power off La Frite until the firmware update is complete!

This will not overwrite the firmware if the firmware is the same so it is safe to run multiple times.
Because your monitor is hooked up, you’ll see a message that the firmware was successfully updated. As of this article, that is the latest firmware. **I needed to upgrade to this firmware in order for the keyboard to work.**
EDIT: No. That is what I thought I did but looked back at my notes and realized I went to Libre Computer’s Hub site and downloaded an image there and flashed it with Rufus on Windows. I’m sure I could have used dd on Ubuntu but was unfamilar with exactly how to make that run.
This gave me a bootable thumb drive that upgraded the firmware for me. I plugged it in to the monitor, plugged the thumbdrive in, and powered up the La frite. I could see the board get updated.
Copying a new OS to the eMMC
It actually gets easier from here!
According to this forum post, you can make the La Frite look like a USB drive. However, there are a few steps to actually mount it to your computer (I used Ubuntu for this). Thanks to DB3D Dan for making this video of steps:
This video shows you how to do it all the way to having an OS installed. Note: He sets the name and password in the Raspberry Pi Imager, but that did not work for me. I needed to create a new user once I booted it for the first time.
To boot it, you’ll need an HDMI monitor, ethernet cable, keyboard, and mouse. (I didn’t use a mouse and just selected things with the tab and space keys).
I used this file for the raspbian images made by Libre Computer: https://distro.libre.computer/ci/raspbian/11/ and chose the one with “aml-s805x-ac” in the title.
Here are more instructions from Libre Computer on what to install to make the video above possible.
Finishing Up
Now that you’ve flashed the firmware and uploaded the Raspbian OS, we are ready to install OctoPrint. Unfortunately, it is not as easy as using the OctoPi software image with these boards. BUT, it isn’t impossible and is much easier than what we just did.
If you are not interested in OctoPrint, then congrats! You now have a shiny SBC ready to go.